
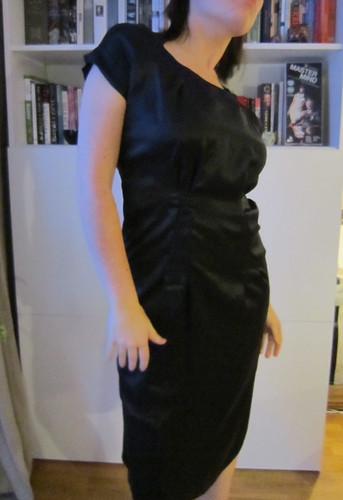
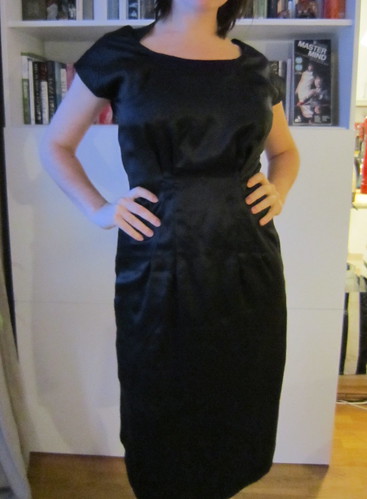
Sencha the Dress
Thanks for the lovely comments on my wardrobe production, people! A couple of you wondered about how I made Sencha into a dress. So I thought I´d share that with you all.
First of all, this is not at all complicated, so anyone who knows how to make a Sencha blouse can make her into a dress as well.
The most important thing here is to make a muslin. I don´t always make muslins when I sew, I rely a lot on tissue fitting, but when it comes to major pattern alterations, I like to make a muslin, just in case.
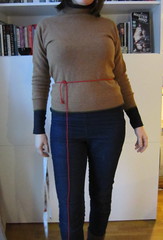
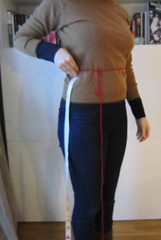
- Decide upon the length you would want for your dress. Measure from your waistline and to that point, and then add 4 cm for the hem seam allowance. For example: You want it to stop 60 cm below waist. That´s 60 cm plus 4 cm: 64 cm.
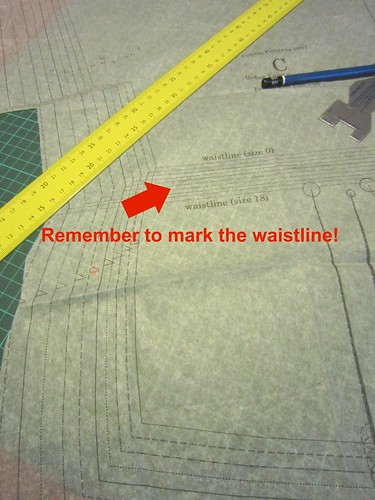
- Gather your pattern pieces for front and back, trace off and cut out as the instructions tells you to onto the muslin, except from the hem. Leave fabric for the extended hem. Be sure to mark the waistline! That is important. Like really important.
- Now, depending on your body type you have two choices. For me the first version worked just fine. Version A is less fuzz, version B is almost no fuzz.
VERSION A:
Take your measuring tape, extremely long ruler or whatever you prefer, and measure from the waistline at center back and center front, down to the point where you wanted your dress to end. Extend the line from the waistline and down to the new hem mark, make a new hem line, et voila, you have yourself a Sencha dress pattern. Cut the pieces, making sure to have generous seam allowances from waist down – just in case.
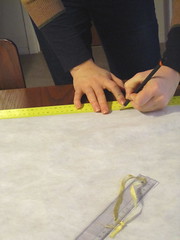
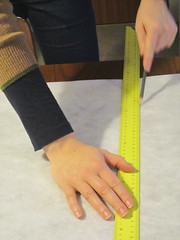
Aren´t I good at pretending to mark my pretend muslin fabric? Notice that giant yellow ruler?
I got it for Christmas from my parents. Veery happy about that one. Thanks!
VERSION B:
Measure the width of your hips, and add 4 cm for ease (That would make 1 cm on each of the front and back pattern pieces). Measure (on your body) the distance between your waistline and hipline.

On muslin, make a mark for the hipline, vertically, at the same distance from the waistline as you measured, at both center back muslin piece and center front. Make a new mark on the opposite side of your pattern pieces (hoirzontally – look at the drawing above) by dividing your hip measurement including wiggle room by 4, and add at least 2 cm seam allowance. Make a new hem mark based on your first measurements, by drawing a line from the waistline mark on the pattern. Extend the line from the waistline, through your hip point and down to the new hemline marking. Draw a horizontal line from the center front/back, and to the side of the pattern. Cut the pieces, making sure to have generous seam allowances from waist down – just in case.
- Now. Stich all the tucks on your muslin, as well as side seams and shoulder seams, and then try the beauty on. Now thispart is a bit tricky with Sencha the dress (as well as with Sencha the blouse), because the buttons aren´t in place yet. You could either pin everything in place, or you could baste it together. I machine basted mine, and because this dress has a lot of ease, I could just pull it over my head. If there are adjustments that needs to be made, the generous seam allowance should then come in handy.
- If you like the dress and it´s fit, just take the pieces apart, use them as pattern pieces, and start stitching it up in your fashion fabric!
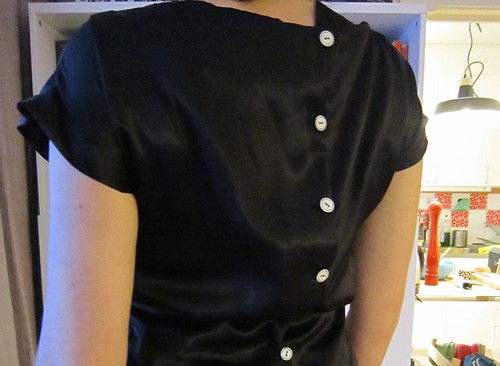
- Button placement. Now this is actually quite important when the buttons go all the way down, you wouldn´t want to place a button exactly where there is a lot of strain, so that it pops when you bend down to pic up something (like I did – on a concert scene – in front of a hundred people -haha!). So, to avoid this, place the buttons strategically, fasten them extra super well (I know the Sencha pattern doesn´t call for interfacing for the facing – but interface it anyway – it looks much neater). Another trick is to add more buttons than I did – that off course depends entirely on your relationship with buttonholes;-). Anyways, mark your buttonholes, from the top and down, either using the pattern markings, or your own. I added 7 extra buttons. If you are not a fan of buttonholes you should check out this tutorial from Tasia, another non-fan of buttonholes. I myself is quite the fan. Of both Tasia and buttonholes. 🙂
You see the third button from the hem? No? It´s because it isn´t there. That´s the one I popped. Yup. I popped it September 25th LAST year! Tihi- I love that kind of beginning-of-the-year-jokes. Have I done anything with it since then? Oh, no. Maybe tomorrow… Maybe after the weekend. We´ll see.
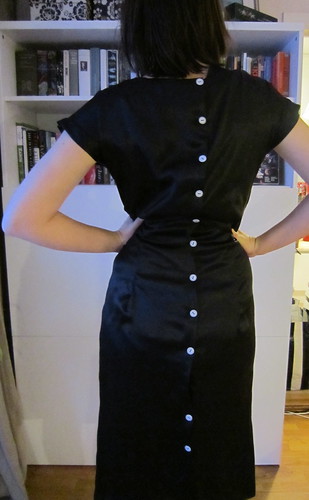
Alright! Now you should have your very own Sencha the Dress to stroll around town in! If not, don´t hesitate to ask! If you make a version, please share it with me, I´d love to see another version!
So pretty! I love the contrasting buttons on your version. I think I’ll give this one a whirl, too! 🙂
Genius!
Hooray! Thanks for the tutorial – I’ve added it to my future projects list.